What This Tool Can Use
The current app supports two natal sources:
Manual Natal, where you enter natal date, time, location, and time zone directlySaved Snap, where a saved Astro Clock snap becomes the natal source
When Saved Snap is active, the manual natal fields are ignored and the selected snap becomes the natal chart used by the transit routes.
Screen At A Glance
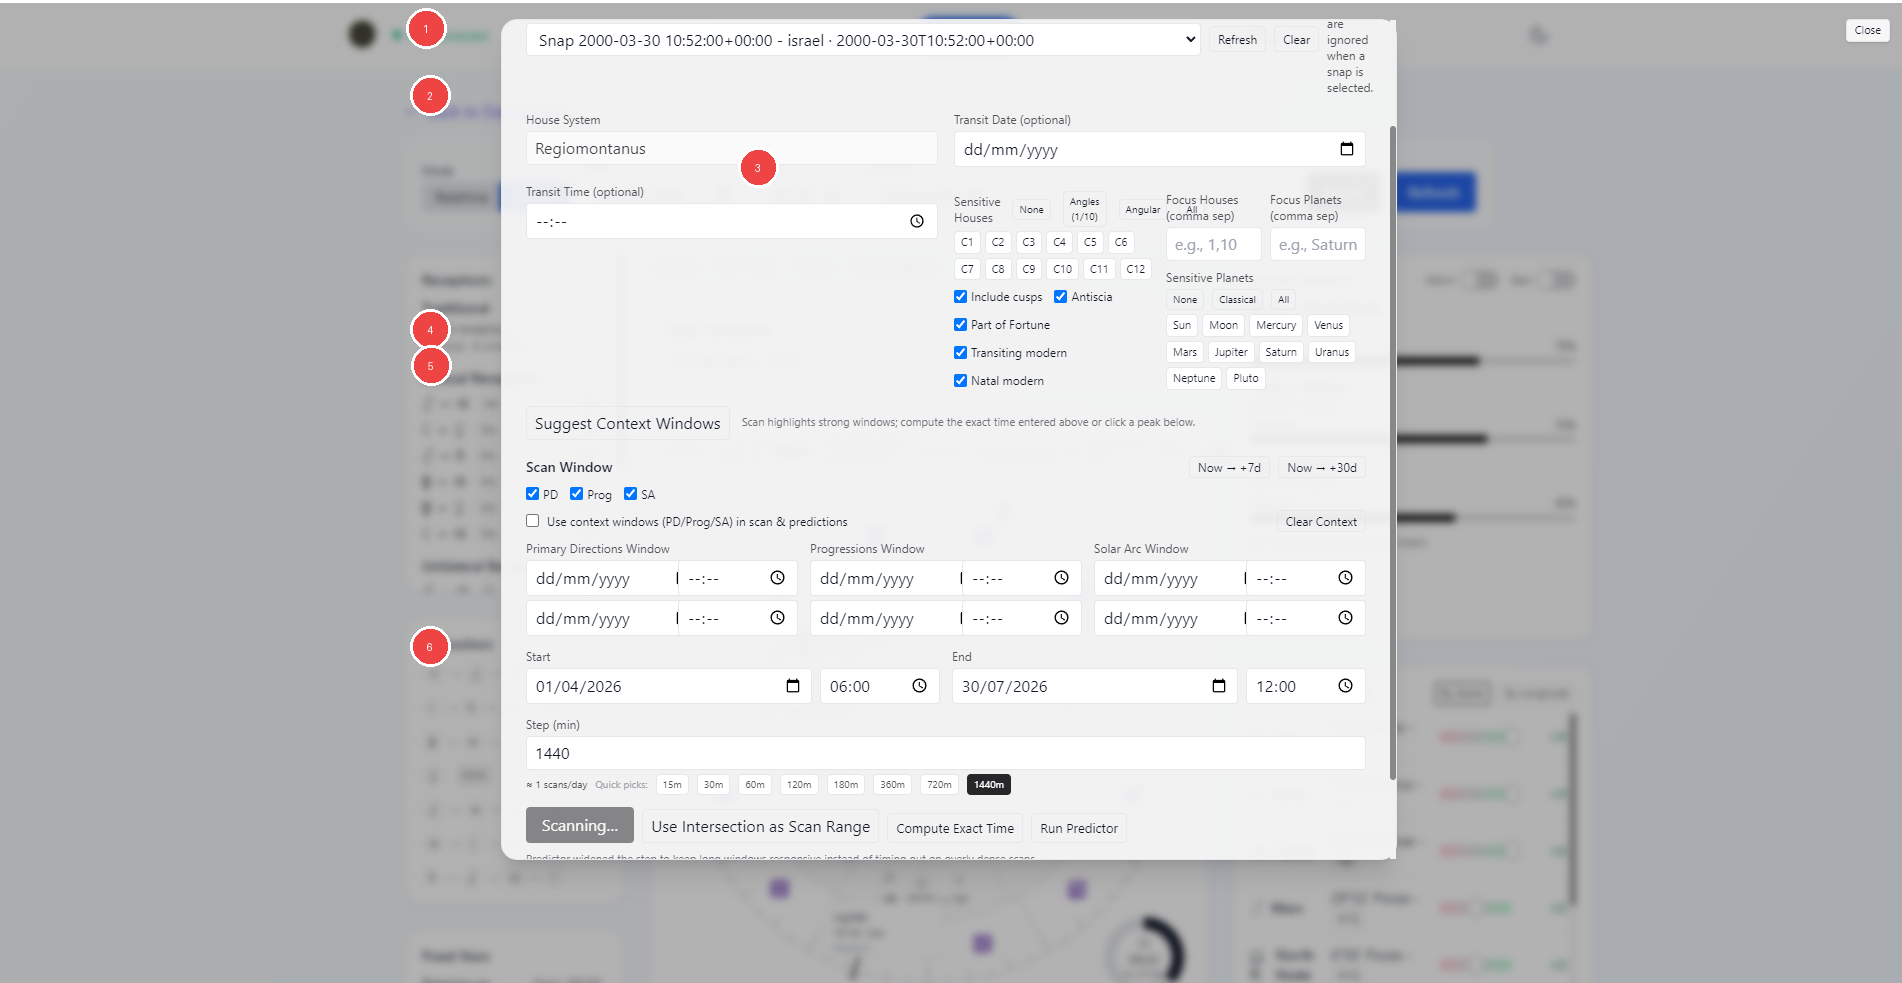
- Source selector and saved snap picker
- Chart setup fields, including house system and transit date or time
- Sensitivity filters for houses, planets, and optional layers
Suggest Context Windowsaction- Scan Window range and context-window controls
- Main scan and prediction actions
Choosing The Natal Source
Manual Natal
Use Manual Natal when you want to type the natal chart details directly.
The modal accepts:
- natal date
- natal time
- natal location
- natal time zone
Saved Snap
Use Saved Snap when the natal chart already exists as a saved Astro Clock snap.
- Pick the saved snap from the selector.
- Use
Refreshto reload the snap list. - Use
Clearto remove the current snap selection.
This is the cleanest way to reuse a natal chart across repeat transit work.
Main Setup Fields
The current UI keeps the house system fixed to Regiomontanus.
You can also add:
- an optional transit date
- an optional transit time
- sensitive houses
- focus houses
- focus planets
- sensitive planets
- optional layers such as cusps, antiscia, Part of Fortune, transiting modern, and natal modern
These controls shape what the transit scan pays attention to.
Context Windows
The Suggest Context Windows action fills optional timing windows for:
- Primary Directions
- Progressions
- Solar Arc
These context windows can then be used in two ways:
- as supporting timing layers for scans and predictions
- as inputs for
Use Intersection as Scan Range
Use Intersection as Scan Range narrows the active scan range to the overlap of the enabled context windows when that overlap exists.
Scan Window
The main Scan Window section defines the wider period you want to inspect.
You can:
- fill the range manually
- use quick ranges such as
Now -> +7dorNow -> +30d - choose which context layers are enabled
- decide whether those context windows should be used in scans and predictions
- choose a step size in minutes
The step size controls how dense the scan is. Smaller steps create more scan points; larger steps move faster through longer windows.
Main Actions
The bottom action row is the working core of the modal.
Scan Windowscans the active range and surfaces stronger windowsUse Intersection as Scan Rangenarrows the current range to the overlap of the enabled timing windowsCompute Exact Timerefines the timing from the current setupRun Predictorgenerates grouped support windows and predictor results for the active range
Timeline And Predictor State
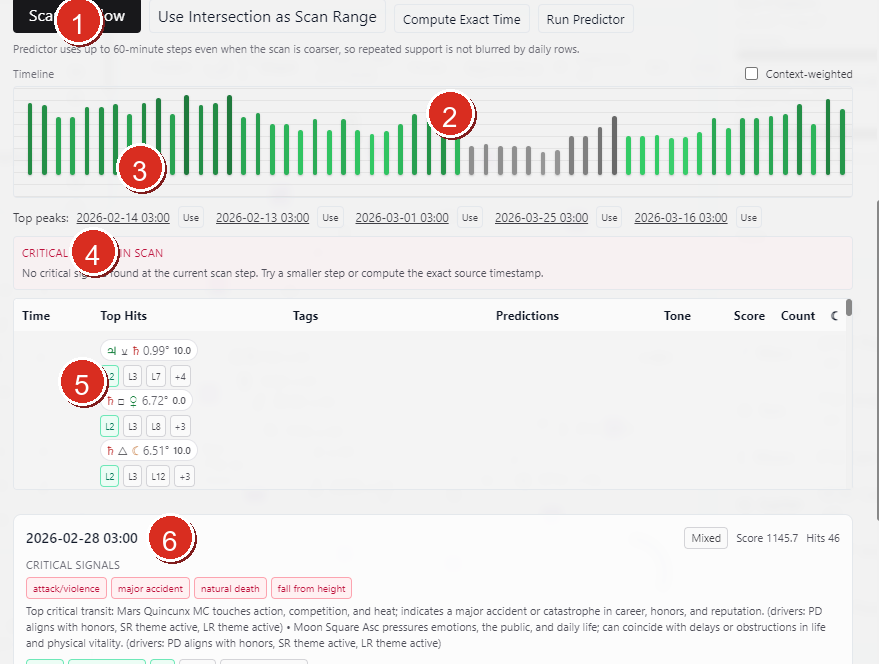
- Main action row with scan, intersection, exact-time, and predictor actions
- Timeline header and
Context-weightedtoggle - Timeline bars for the active scan window
- Critical-signals status strip for the selected step
- Hit table for the selected timestamp
- Selected result card with score, hit count, and critical-signal summary
When scan results are present, the modal can move into a timeline-driven state.
This part of the UI lets you:
- click a bar in the timeline to select a timestamp
- use
Top peaksshortcuts to jump straight to stronger moments in the scanned range - toggle
Context-weightedto reshape the timeline emphasis when context windows are active - move from a broad range scan into a more focused selected-step read
This is the fastest way to move from range-level exploration into moment-level inspection without leaving the modal.
Reading Results
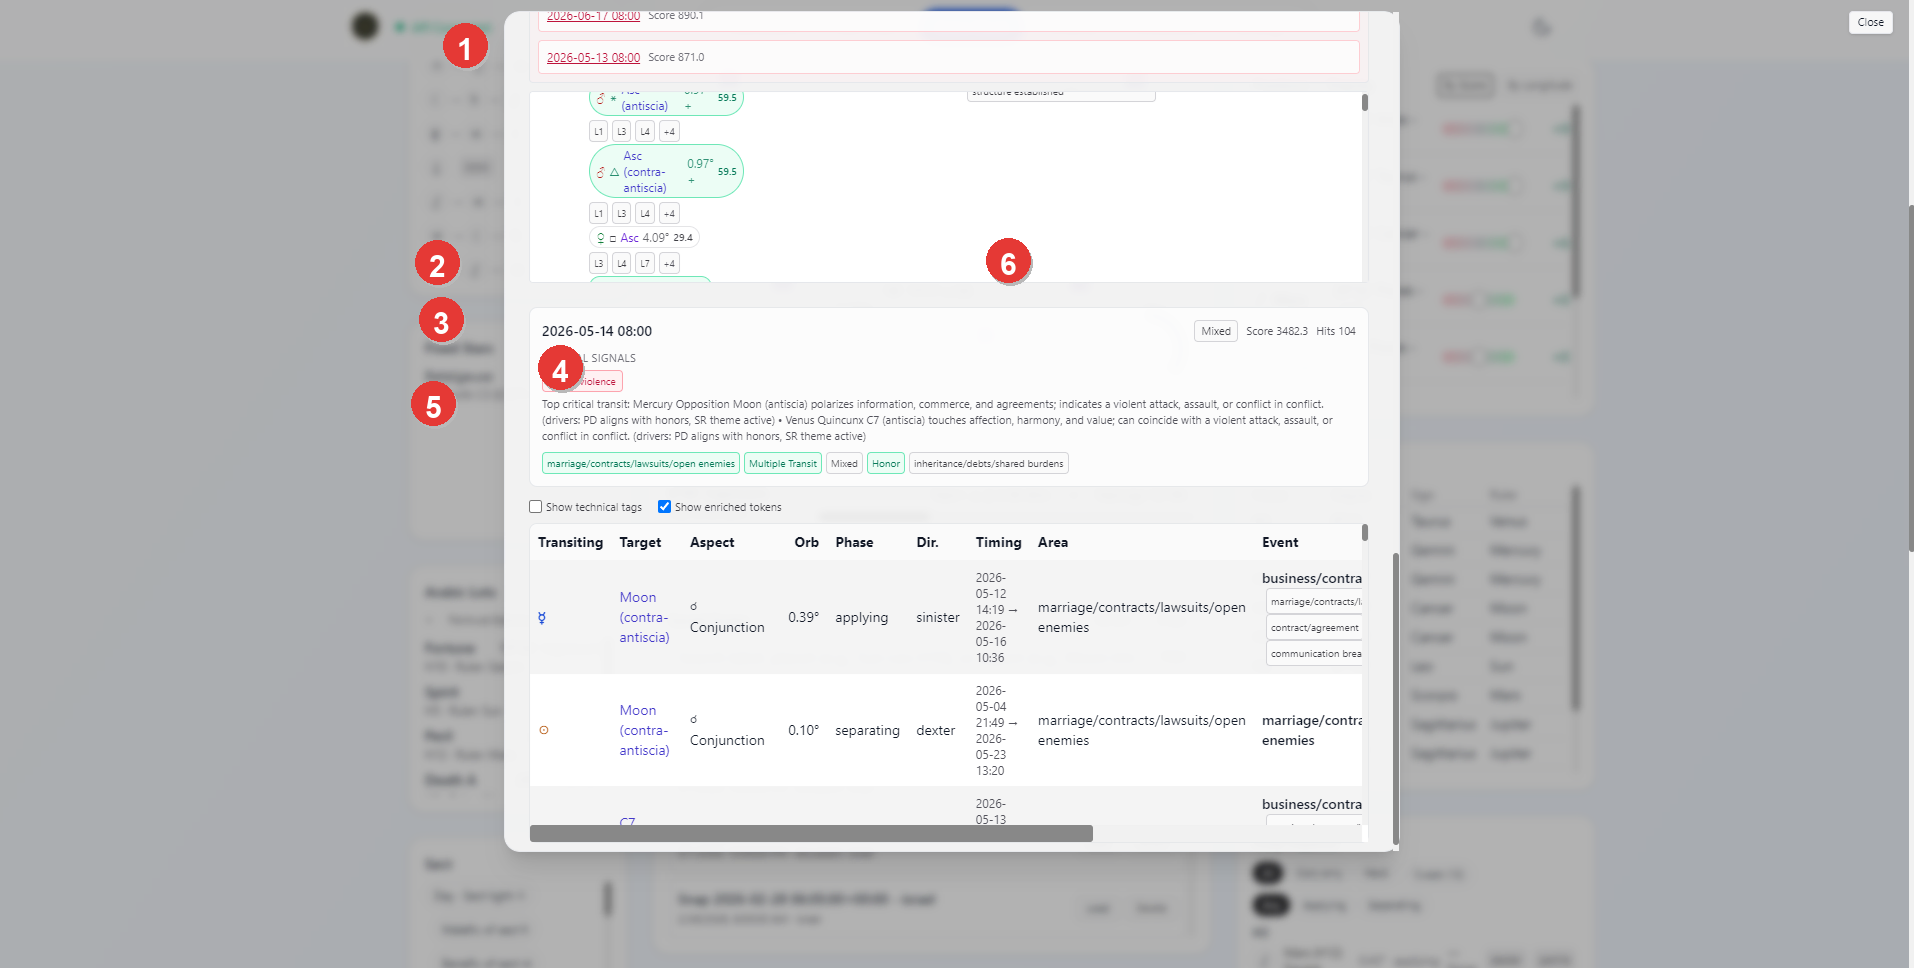
- Candidate or peak rows in the scan result list
- Selected result timestamp
- Critical signal summary
- Area and topic chips for the selected result
- Technical or enriched-token toggles and evidence table
- Score and hit count for the selected result
When a scan result is selected, the modal surfaces a detailed card for that moment.
The selected result can show:
- the selected timestamp
- summary labels such as critical signals
- topical chips such as life areas or event families
- score and hit counts
- a detailed evidence table showing the transiting factor, target, aspect, orb, phase, direction, timing, area, and event labeling
This is the part of the tool that turns a broad scan into a readable candidate moment.
The current result area also supports additional display toggles such as:
Show technical tagsShow enriched tokens
Use these when you want the result table to lean more technical or more interpretation-friendly.
Practical Workflow
For most users, the cleanest transit workflow is:
- choose
Manual NatalorSaved Snap - set any sensitivity filters that matter for the question
- use
Suggest Context Windowsif you want the timing layers - define the scan range and step size
- run
Scan Window - inspect the stronger peaks
- use
Compute Exact TimeorRun Predictorwhen you want a tighter timing pass
Notes
- Saved snaps are optional here, not required.
- The same saved snap source can be used for point-in-time reading, scan windows, and predictor runs.
- Loading a saved natal snap is the fastest way to keep transit work consistent across repeat sessions.